Main Interface Quick Tour
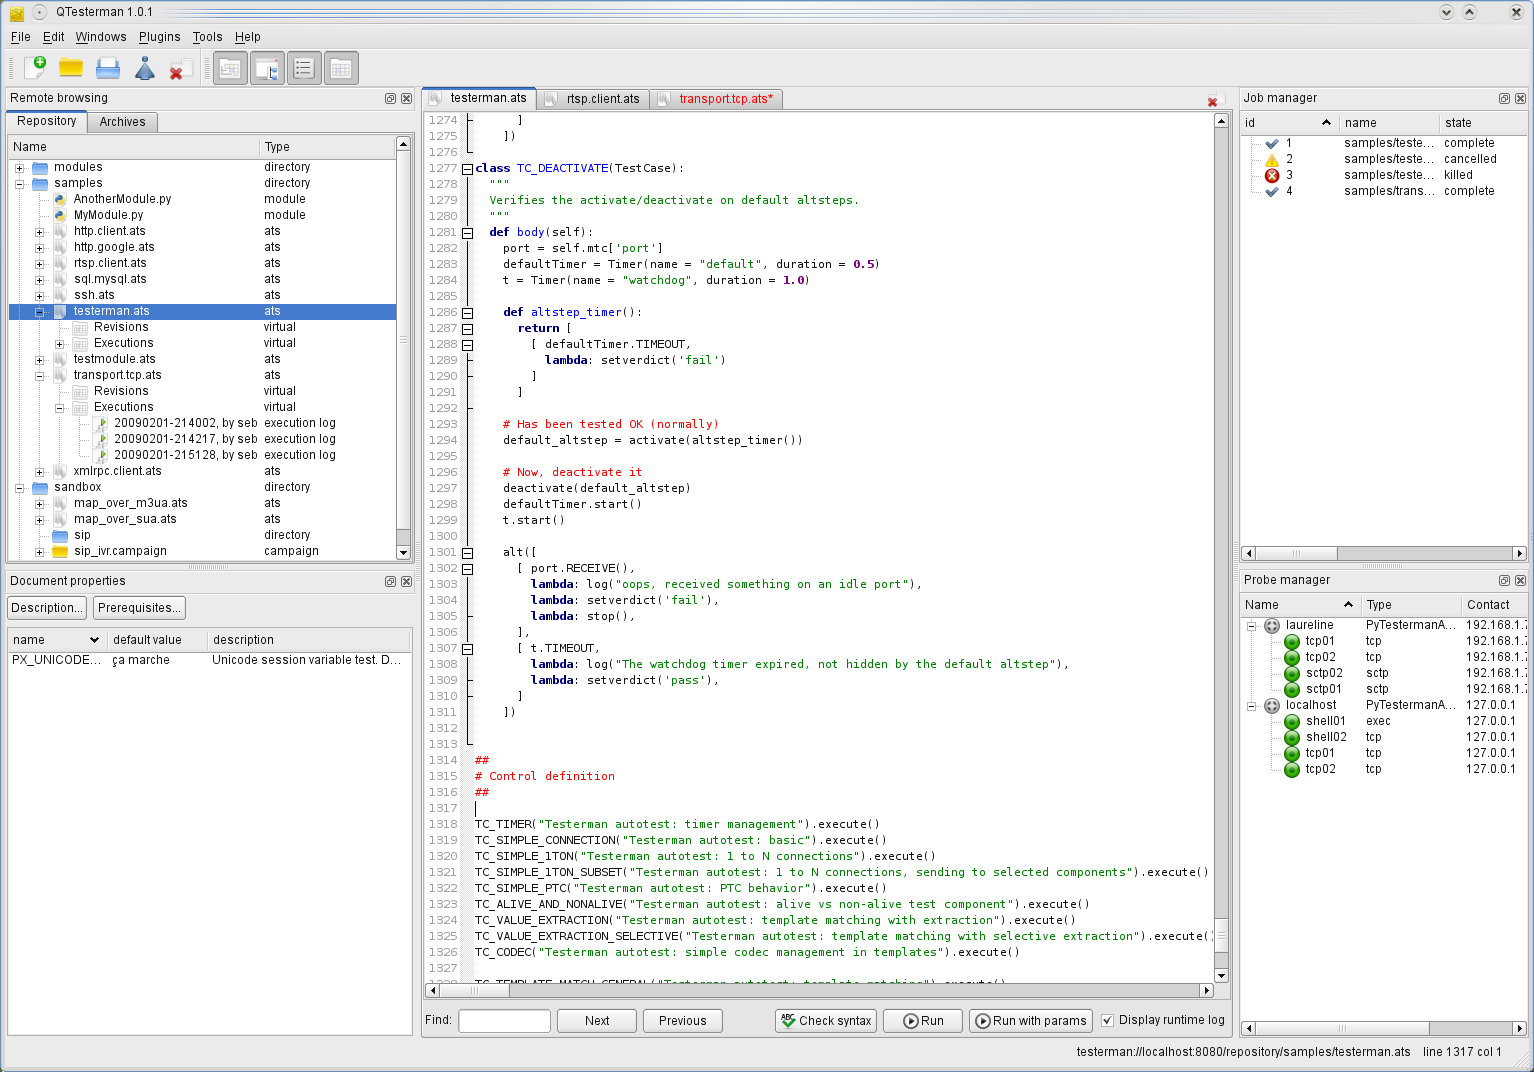
Main interface:
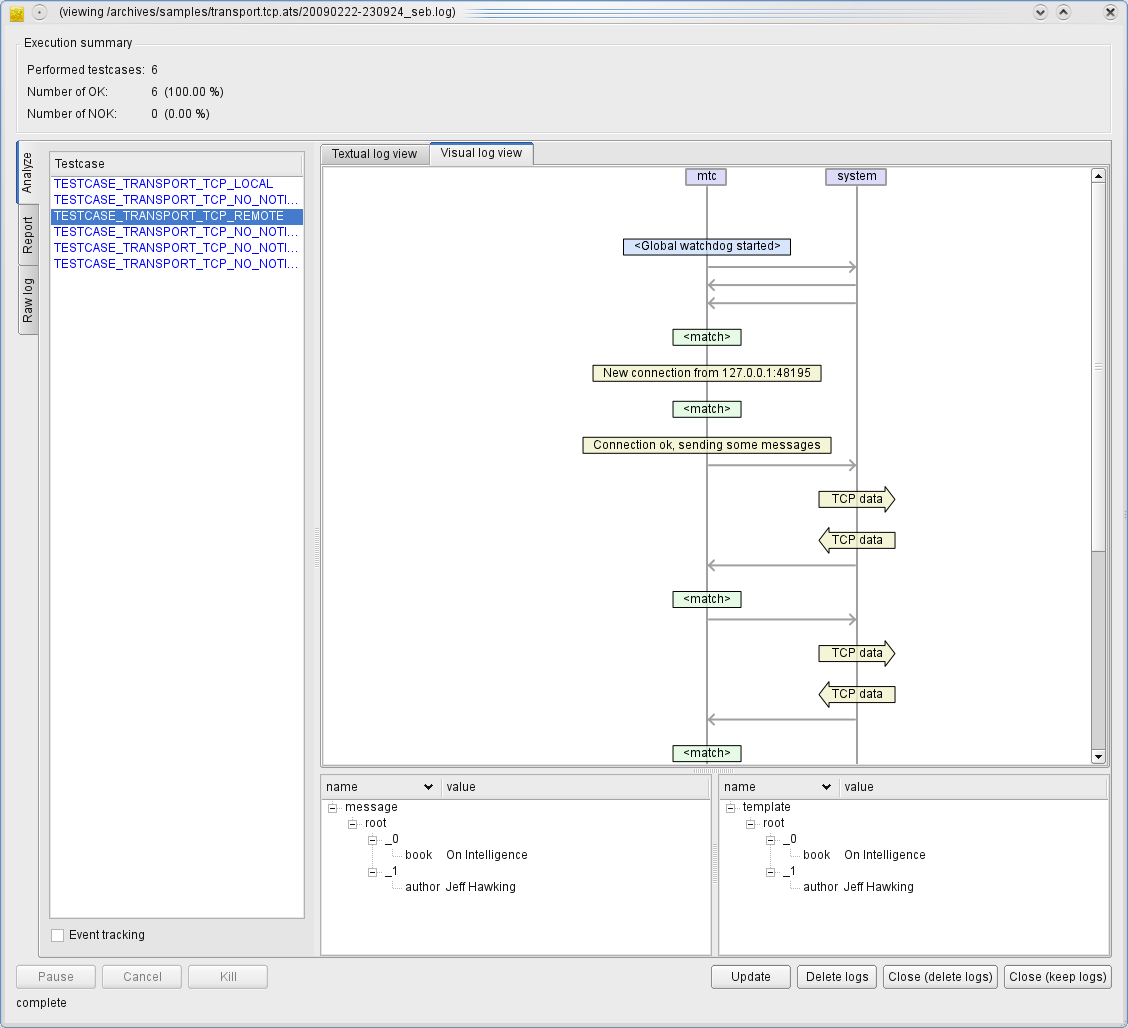
Log viewer, here in visual view mode:
...
QTesterman is the preferred client to execute Testerman scripts, monitor and analyze their executions.
It is a cross-platform application (Windows, Unixes, Mac OS X) developed in Python with PyQt4. This is the main interface to a Testerman system most end-users will use.
QTesterman basically requires Python 2.x >= 2.4.4, and a PyQt4 4.x >= 4.4.2. You may install them the way you are used to, from sources, or following the instructions below. Please notice that actual package versions may evolve and the ones given here may be deprecated or no longer available as a direct link - in this case, just use the next or recommended version on the associated sites.
This section describes how you may install QTesterman dependencies on several operating systems.
If you already installed them, you may jump to the [#RunningtheQTestermanInstaller QTesterman installer execution].
To run QTesterman under Windows, you’ll first need to install Python 2.x and the PyQt4 library. QTesterman is not compatible with Python 3 for now.
If you don’t have any Python installation yet, you are advised to install Python 2.6.1(or latest 2.6.x version) that you can grab from the official Python site (direct Windows Installer link for Python 2.6.5). Once downloaded, simply run it and install the usual way.
Then, get PyQt4 from Riverbank Computing site. You should get the Windows installer package that matches your Python version, for instance PyQt-Py2.6-gpl-4.7.7-1.exe if you installed a Python 2.6.x. The binary PyQt4 package contains everything needed for QTesterman, in particular the QScintilla2 module. When installing the package, you can limit your installation options to the single “Qt libraries” option, discarding all development tools, documentation, and examples.
Once these dependencies have been installed, you can proceed with the [#RunningtheQTestermanInstaller QTesterman installer execution].
QTesterman has been tested on the following combinations:
Under Debian and derivatives, you should apt-install the following packages (and their dependencies):
python-qt4python-qscintilla2QTesterman has been tested on the following distributions, with their standard up-to-date packages:
Under Red-Hat and derivatives (CentOS, Fedora, RHES, Mandriva, ...), you should install the following RPM (and their dependencies):
PyQt4RHES4/CentOS4 only provides Python 2.3, so it won’t run on them.
If you successfully installed QTesterman under an OS X version, please send me some feedback to complete this section !
Once the prerequisites are installed, you can download and execute the QTesterman Installer.
python Installer.py (./Installer.py may
also work)If your dependencies are correctly installed, you should get a
minimalistic installer window enabling you to select your installation
directory (in which a folder qtesterman will be created) and provide
a Testerman server URL (http://your-server:8080).
This server URL should point to a running Testerman server configured
to deploy a QTesterman component. Your Testerman administrator is
supposed to configure it for you correctly, or you may have a look to
TestermanAdministrationGuide to do it yourself.
When ready, click install; the installer should detect a new QTesterman version available on the server, and prompt you for an upgrade. Accept, wait for the installation to complete.
Once over, QTesterman is installed in your
installation directory/qtesterman. You may create a shortcut to the
qtesterman.py file contained in it - this is the Python file to run
to start the QTesterman client.
You may delete the downloaded Installer.py file.
The first time you execute the qtesterman.py script, you’ll need to
provide the URL of your Testerman Server and a username that will
identify you on this system.
For now, this username is not associated to any password since no rights management is implemented yet. It just enables to have an idea of who is currently running jobs, who should be contacted by the administrator in case of a problem, etc.
...
QTesterman comes with two default plugins enabling to create template-based reports at two levels:
Both plugins can be used as a basis to built any kind of text-based reports, ranging from plain text to HTML pages, from CSV files to XML-based document (think ODF). They are based on a template engine that implements a subset of the Velocity engine features.
From such templates, you can access to different variables and functions depending on the calling context (ATS documentation report or test execution report); in particular, you can easily include [TestermanReferenceGuide#DocumentationSystem documentation string tags].
A template is a text file that may contain particular tokens interpreted by the engine. Actually, all of the following is Velocity-compliant, and you can also refer to the Velocity engine documentation directly. Yet, some Velocity features are not implemented, in particular:
#evaluate directiveAdditionally, there are no built-in/default velocimacros, though you can define your owns.
The following template
You won't see the following lines.
## This is a single-line comment

#*
While this
is a multi-line
comment
#*

Use \# to escape the pound sign.
will result in:
You won't see the following lines.


Use # to escape the pound sign.
you can create variables in a template dynamically:
#set($foo = "QTesterman")
Hello $foo World!
Leads to:
Hello QTesterman World!
You may reference a context variable at any time with a $myvar or
${myvar} syntax.
The available context variables for each plugin are defined below.
My variable: $my_variable
Another variable available in my context: ${another_variable}
Say_${within_a_word}_here
If a reference is not found when applying the template, the template
code is unchanged. For instance, with the template above, if
my_variable evaluates to 2, within_a_word to "hello",
but another_variable is not found, this will produce:
My variable: 2
Another variable available in my context: ${another_variable}
Say_hello_here
To substitude the placeholder with a blank instead of leaving the
original template code, use a $my_var syntax:
Missing variable: $!{missing}
Would generate:
Missing variable:
If a variable cannot be evaluated to a string representation, an exception string is injected instead.
Some object referenced by such variables may expose additional properties or methods. In this case, you can access them with a dot-based notation:
This is an object attribute: ${testcase.id}
## Also works without {}:
$testcase.title
## And also with methods
## Assuming $a is a string:
$a.replace('\\n', '<br />')
Actually, you can also reference a call to an exposed function directly.
Let’s assume that a function toHtml(s) that escapes the usual HTML
characters is provided in the current context:
<p>Description: $toHtml($description)
</p>
Applied with $description that evaluates to
"check that 100 > 10,\nthen make sure that the function returns within 10s":
<p>Description: check that 100 > 10,<br />then make sure that the function returns within 10s
</p>
Some variables are evaluated to a list of items. In this case, you may
use the #foreach directive to iterate through them:
#foreach ($testcase in $testcases)
Testcase Identifier: $testcase.id
#end
A if/elseif/else mechanism is available:
#if ($name)
Test case name: ${name}
#else
Undefined test case name
#end
The usual operators are supported: <, >, <=, >=, ==, =, && (and), || (or), ! (not).
this is#if ($a > 10) large#elseif ($a > 5) medium#else small#end, don't you think ?
Notice how you can mix directives and the normal text to procude the desired output.
This plugins exposes the following variables and functions:
| Name | Type |
|---|---|
testcases |
list of testcase objects |
...
This plugins exposes the following variables and functions:
| Name | Type |
|---|---|
testcases |
list of testcase objects |
...
Ctrl+Mouse Wheel to zoom in/zoom out in the Visual
Log ViewerAlt+K to start recording keys, Alt+K again to stop recording,
Ctrl+K to replay (shamelessly inspired by
nedit)Ctrl+Shift+A on a plugin in the Settings window will display some
additional information about it